
In this post, I will share a few helpful tips I have learned to help you make the switch as well as the steps I took to make my first shoot in manual mode a success.
The Three Amigos Make Yet Another Appearance!
I'm sure that as you pick up your camera, you are already thinking about a few things you have read in this blog time and time again.

Notice that the order in which they appear is different this time. I wanted to give you a visual representation of what I give consideration to first when setting up my shot.
 1. To start, I evaluate the type of light I'll be working with. If the shot will take place outdoors, I adjust my ISO to compliment an early morning, noon, late afternoon or night setting. I choose the lowest ISO possible for each situation knowing that it will give me a better quality shot in terms of color and clarity. I also keep in mind that the higher the number I choose, the more noise is introduced into the shot. I select an ISO between 100-200 if I am outdoors on a bright day. An ISO between 400-600 is suitable for an overcast day or when shooting indoors. Night photography will require that I bump up my ISO to a larger number like 800-1600. If your light availability will not change for the duration of the shoot, it is easy to just set the desired ISO and you won't need to adjust it again for the remainder of the session. For more information on this subject visit the following link: http://nikon-newbie.blogspot.com/2011/11/iso-basics-for-newbie-photographer.html.
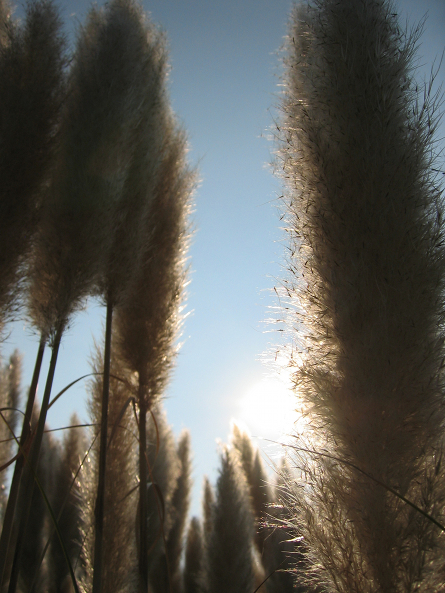 |
| When selecting ISO, first evaluate the type of light you're working with |

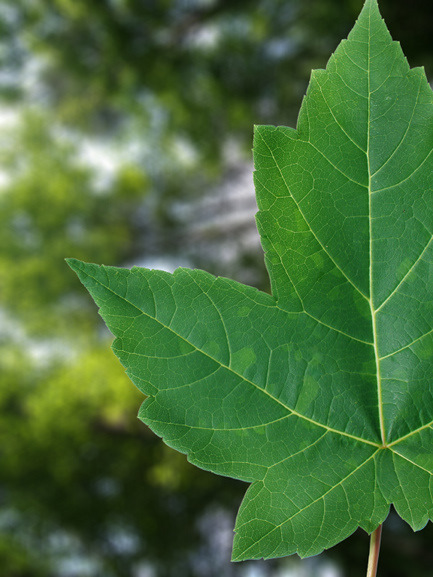 |
| Aperture is a great feature to use because it can blur distracting objects in the background while drawing attention to your subject. |
 3. Next up is shutter speed. If my subject will be in motion for the duration of the shot, I will focus on shutter speed first and then adjust the aperture. For example, if I was taking a picture of my children playing in a pile of leaves, and wanted to freeze the action (jumping in the leaf pile or throwing leaves into the air) I would focus on my shutter speed first. I would choose a fast shutter speed like 1/500s or 1/1000s. If I decided to blur the action to indicate movement, I would use a slower shutter speed like 1/250s or 1/350s for a moderate blur. Remember: Shutter speeds slower than 1/60s require the use of a tripod. For more information about shutter speed, click the following link: http://nikon-newbie.blogspot.com/2011/11/shutter-speed-101.html.
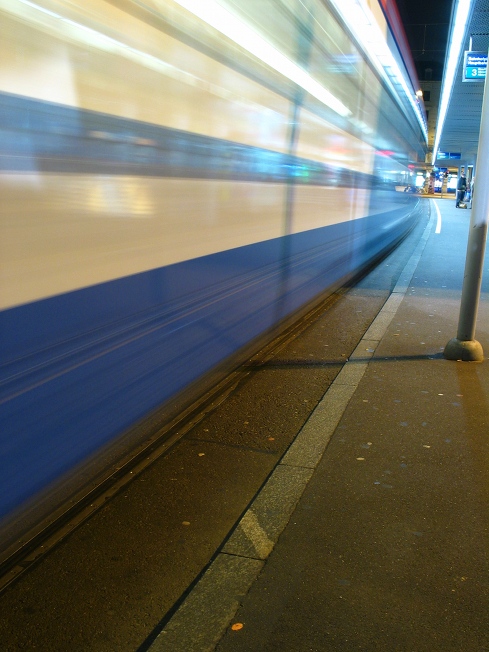 |
| A slow shutter speed can give your photo this blurred effect |
So there you have it, basic tips to get you started in manual mode. The key to being successful with manual mode is practice, practice, practice! If you have been inspired to take the plunge, tell me about it! I would love to hear your comments about how you made the switch. Bear in mind that the tips in this blog are suggestions based on my experience and research. The best shooting mode is the mode that gives you what you are looking for in the shot and one that you feel most comfortable with. There are times when you will want to use manual mode and times when you feel that a semi-automatic mode is best! Just get out there and click to your heart's content!
