Tuesday, December 27, 2011

Need A Little Inspiration?

Have you ever found yourself becoming lost in a photo? Wanting to be where the photographer is at that very moment? Maybe you've felt connected to the subject in some way, drawn to the joy or sorrow in their eyes. Well, I sure have! Its been said that the mark of a great photograph is its ability to conjure emotions in its viewer. So then arguably, the mark of a great photographer is their ability to capture emotions in their photos! Desiring to improve my skills in this way, I started having a look at some really awesome websites for inspiration. I pinned many of them and shared via Facebook and twitter. I have also decided to share a few of them with you via my blogger platform as well. This is a growing list, so come back for updates as I will continue to add sites I come across that inspire me. In need of some inspiration? Here's what the doctor ordered!


Jasmine Star
Prepare to be inspired!!! I discovered Jasmine Star a few days ago and I now find myself visiting her site daily because not only is the experience an empowering and educational one but it's incredibly fun as well! She has a great sense of humor and her creative use of words makes the reading experience an enjoyable one.  


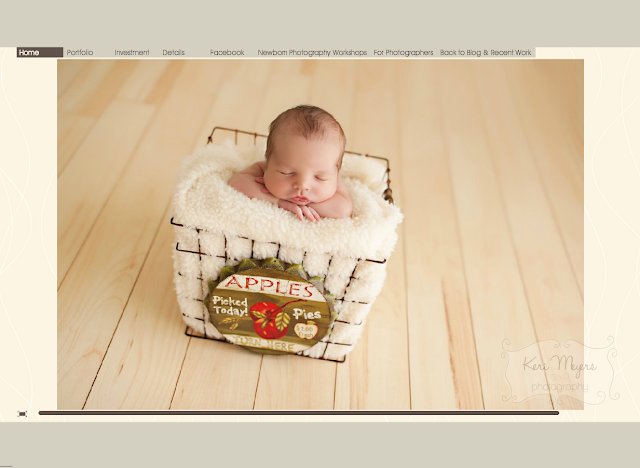
Keri Meyers Photography
One look at Keri's portfolio and I was a follower! Take a look and you will be too!


1x.com 
In a word..."superb!" A photo gallery and social network site. 1x hosts photography forums, tutorials and and boasts of an active international community of professional photographers. The quality of work is outstanding. See for yourself, but be careful...you can easily spend hours on this site!


Chase Jarvis
This visionary photographer's portfolio contains scenes that are breathtakingly beautiful and charged with emotion. Get lost in them.


Mostly Lisa
This addition was a  truly great find for me. Not only did Lisa inspire me with her photography, her words spoke directly to me...encouraging me to take that next step. To have confidence in my ability, to expect great things by getting out there and making them happen. The above link takes you to her post entitled "8 Things to Inspire You to Keep Shooting and Sharing Your Photography." While you're there read this article about setting goals you will not be disappointed!


Expert Photography
...and the sites just keep getting better! I stumbled upon another gem of an article today from Expert Photography showcasing the "Top 20 Young Photographers 2012". Absolutely stunning work in the conceptual, emotive, surreal, fashion and expressive styles to name a few! Take a look.


Robert Jaso
Truly inspirational! His portfolio a must see for its innovation and sheer grandeur. Enjoy as I did!


Harry Vorsteher
This professional photographer certainly doesn't disappoint with his images and site design. Love it!


Christian Oth
American Photo magazine has dubbed him one of the top ten wedding photographers in the world! Find out why...and be inspired!


Crave Photography
Andrea Tate is a photographer I've been following just recently and can't seem to get enough of her photos. She is both creative and talented. I'm keeping my eyes on her work...there's much to learn from her!


Meg Borders
Here we go again! Another favorite photographer I've added to my list. I could not have written this post without including her. Love, love, love her work! Pop in and enjoy! That's an order! LOL!


Firefly Nights Photography
The more I search, the more talent I uncover! This is great! I am so happy to be able to share these finds with you! A photographer I have grown fond of in just a few days is Megan Drane of Firefly Nights Photography. I stumbled upon her blog on Pinterest a few days ago and was immediately hooked. What drew me to her was not only her fantastic work but the fact that she specializes in photographing children with special needs. I worked as a special needs teacher for a few years before becoming a stay-at-home mom and can relate to the joy she feels when working with these wonderful children and their parents. To capture that special sparkle in their eyes cannot be described in words. Stop in for a visit.


Trever Hoehne 
Trever Hoehne is a commercial photographer whose work speaks in volume of his undeniable talent. A visit is definitely worth your time. You'll be glad you did!


Elle Ticula Photography
This is always a go-to site for me when I need ideas and a lil bit of inspiration thrown in the mix. Great website and awesome photographer. You'll enjoy this one! Guaranteed!


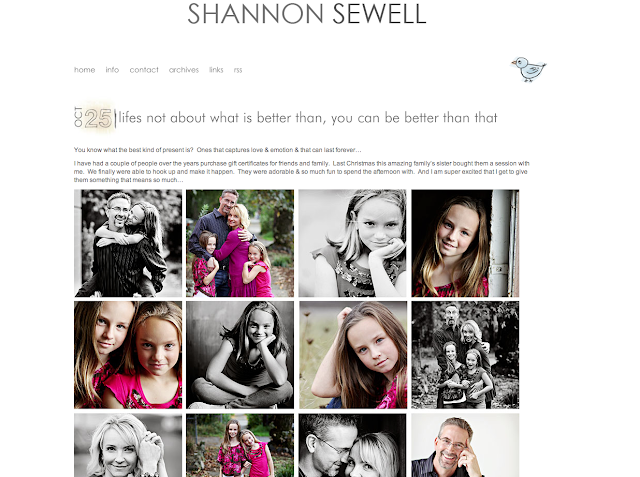
Shannon Sewell
It would seem Shannon does it all, just click on her archives list and feel your jaw drop as did mine. Ready for some inspiration soup? She's serving it up!


Mark Delong Photography
Ok...I was working on another post and just happened upon this photographer's site. Unbelievable awesomeness!!!! I'm not sure why I hadn't discovered his site before, but I was so ecstactic about his work that I stopped what I was doing and added his portfolio to this list. Time well spent here!


Monday, December 12, 2011

RAW verses JPEG...Confused? Read On!


I was not prepared to delve into this subject just yet, but after hearing so much about RAW and JPEG, I decided it was time to explore them both and determine which one would take center stage for me. 


JPEG stands for Joint Photographic Experts Group which is the name of the group that developed the format. Now here's what you really need to know about "the JPEG". Its most common use is in the compression of images for computer storage and transmission over the Internet. However, when these images are processed by the camera information is lost, which is why it has been given the term "lossy" format. Each time the file is compressed, the more data it loses.


JPEG Tidbits:
  • Called an image distribution format because it is used to transmit images across the internet.
  • Sometimes difficult to correct color and exposure errors since the camera tosses some of the image information before storing it.
  • Produces a sharp image with high contrast.
  • Ready for immediate use, can be uploaded or printed and shared right away.
  • Is a compressed file which doesn't take up alot of memory.
  • Doesn't need special software to access, is very compatible with most devices.
  • Easy to work with.
  • Better for photographing moving subjects because it allows you to take more pictures in the continuous shooting mode.

Unlike JPEG, RAW isn't an acronym. Just as the name implies, it is simply an untouched (raw) digital image which basically means it has not yet been processed. It is sometimes referred to as a digital negative because it preserves all the information from the image file with minimum loss of data. It has also been known as a loss-less format because of this feature.


RAW Tidbits:
  • Described as an image capture format intended to give you maximum control of the final product.
  • Retains image information making it easier to make corrections with color and exposure.
  • Not available for immediate use without processing.
  • Needs specific software to access image files. The software may come with your camera, if not you can always purchase it or use free programs found on the Internet (Picasa) to help you. Adobe Lightroom, Photoshop, and Capture One are a small list of available programs that can be used.
  • You are in control of the final product.
  • A RAW image lacks sharpness and contrast.
  • It's an uncompressed file that takes up a lot of space on both your SD cards and computer hard drive. It can take up to four times the amount of space as a JPEG file.
  • Transfer to the computer hard drive is slowed.
  • Not a good choice when photographing in continuous mode.

JPEG Image
RAW Image
RAW image edited by Picasa (free software!)


Not sure when to use RAW or JPEG...


It all boils down to this...when it comes to determining which format to use, you are in the driver's seat. Choose the format that best meets your needs. Many professional photogs shoot in JPEG and many do in RAW. There is no right or wrong choice here because both formats contain features that make them attractive to both amateur and professional photogs. After giving RAW a spin, I have to say it was great to be able to use a really basic image editing software like Picasa to reproduce an image that had the exposure and color saturation I desired for the shot. It was very easy to do and the software was free! I did notice however that the time to upload each image took a bit longer than my JPEG files and that it took up quite a bit of space. For the moment, I have decided to continue using the JPEG format because it forces me to get the shot right the first time and spares my hard-drive space. I will use the RAW format as a backup when shooting images I can't afford to mess up. I enjoyed the experience of shooting RAW and loved having one more feature to add to my growing list of photography tips. Now what about you? It's time to give RAW a try to decide for yourself what works for you!


Reasons to stick with JPEG files:
  • You are currently shooting in JPEG and you are more than happy with the results of your images.
  • You are unfamiliar with image editing software and don't plan to give them a try.
  • You are taking pictures that you don't plan to edit later, like a day in the park with the kids for example.
  • You don't have the hard drive space to store such large files.                       
Reasons to stick with RAW files:
  • You are working with images where it's vital that you get it just right, ( a wedding for example) use RAW. It's easier to fix exposure problems and color errors in this format.
  • You have the storage capacity on your computer's hard drive.
  • You have the time and the know how to process the images you capture. 

Wednesday, December 7, 2011

Tips For Photographing Snow Scenes


If you follow me on Facebook or Twitter you may have read my tips on photographing snow scenes. I thought it would be a good idea to add the tips to my blog as well and watch the list grow! You can participate in this as well! If you have tips for photographing snow that would be a great addition to the list feel free to post them to my Facebook page or tweet me. This should be fun!


1. Try not to use flash when photographing scenes in the snow. The light from the flash will reflect off the snow causing your photo to be overexposed. Make use of negative exposure compensation and check your histogram to achieve the best exposure for your shot. If the graph is bunched in the middle, bump up your exposure compensation a bit. If its squeezed into the right hand corner of the graph, bump your exposure down a few stops to avoid blown out highlights in your shot.


2. An all white picture of snow can be a bit boring. Spice it up a bit by making use of bright, vivid colors...a colorful scarf, coat or jacket will pop against the white background of the snow.

3. The cold temperatures will sap power from your battery, so always travel with extras if you plan to take a lot of pictures. Place the extra batteries in your pockets close to your body. The warmth of your body will restore some power to the battery!

4. Experiment with different shutter speeds when photographing falling snow. A fast shutter speed will result in an image with fuzzy flakes throughout your shot. Using a slow shutter speed will produce a scene with streaks of snow. Give it a try!

5. Protect your camera when taking pictures outdoors. Use a protective case or even a plastic bag to prevent moisture from entering the lens or camera. If despite your efforts moisture gets trapped inside the camera, remove the batteries and memory card. Wait for about an hour until the moisture is no longer present. If this doesn't work try silica gel. You know...that little packet that you find in your shoe box when you buy a new shoe or new bag. I've always thrown them away...not any more! Place the camera in the camera bag with the silica gel. The gel will absorb the moisture from your camera! Remember to take the gel out of the bag when all the moisture is gone and dry it out to use again. Cool! Caution: Silica gel is dangerous if ingested. Keep away from the little ones and your pets!


6. Increasing your exposure compensation to +1 or +2 will usually produce a balanced exposure for snow scenes and will help rid your shot of the gray appearance of snow associated with an underexposed image. Why does this happen? The brightness of the snow tricks your camera's light meter causing it to tone down the exposure. Bumping up the exposure will give you a more balanced exposure for the shot.


7. If you are photographing snow scenes and your image has a blue tint to it, try using the shade setting to achieve a true representation of the colors in your shot. However, there are times when a blue tint can be used to create an artistic effect.

A blue tint can be used to give your photo an artistic effect.

8. Not only do you have to protect your camera before going out in colder temps, you have to protect it when coming in from cold temps into a warmer environment. When you bring a camera that has been outside into a warm room, moisture in the air will condense onto the camera. The condensation that forms on the internal parts of the camera can damage the components found there. If this happens, remove the battery until the camera has become dry. Drying the camera by letting it sit in warmer temps will eventually dry it out, however there is a risk of damaging your camera using this process. The best way to protect your camera is not to allow condensation to form on it in the first place. To do this, enclose the camera in a plastic bag while you are still outside trapping the dry air into the bag. Put both the camera and different lenses you may have used in the bag before going indoors. In this way condensation will form on the bag and not on your precious camera.


9. Protect yourself by layering smart. Start with a good bottom layer, thermals are a good choice because any moisture that builds up from perspiration will quickly dry. Other materials like cotton will dry at a slower rate leaving you wet and cold. Not nice! Your second layer can be a fleece jacket or light woolen sweater because they trap your body's heat keeping you warm and toasty! Finally a water proof or water resistant jacket with a hood to top it all off. Don't forget to cover your head, hands, neck, and feet as well. When choosing a hat select wool or synthetic materials that will trap heat and resist the wind. Add the hood from your jacket for added protection against the wind and possible snowfall. A woolen scarf will jazz up your look and keep your neck warm at the same time! Use a fingerless glove instead of bulky gloves to give you flexibility when handling your camera. Fingerless gloves that have a flap to pull over your fingers when needed is a great choice. Look for gloves with grips to stop the camera from slipping out of your hands. Wearing snow boots with a combination of woolen socks will do the trick to keep your feet warm; applying a waterproof treatment to your shoes works just as well. I always tuck hand warmers in my gloves as well as feet warmers in my shoes. They are so worth it and very inexpensive! They can also be used to warm your batteries when they become cold. Oh! and don't forget your sunscreen...yes, you heard me. The reflection of the sun on the snow increases your exposure to UVA and UVB rays even on overcast days...so use it! An SPF of 15 or higher works well. Your lips will need sunscreen as well. You don't want them to feel left out do you? There are many lip protectants that are effective to use in cold temps that also provide protection from the sun. Make sure to choose a product that has "UVA/UVB protection" or "broad spectrum protectant" written on them. I really like using Blistex Silk & Shine Lip Protectant and Sunscreen, SPF15. Give these tips a try the next time you're out in the bitter cold.

10. Invest in a lens hood for additional protection when photographing falling snow.

11. A polarizing filter can add color and depth to your image giving clouds a whiter appearance and making a blue sky pop with color. Another great feature is it's ability to tone down glare from snow or ice.

12. We view the world in living color which is quite different from the way the camera sees it. It has been designed to see everything in middle or neutral gray tones (equivalent to18% gray) and exposes for this. When photographing snow, if you depend on your light meter, the snow will have that dull gray color we talked about earlier. Here's where metering comes into play. Set your camera to spot metering and meter off objects that have a middle tone ( a color that's not too dark or too light). A blue sky, weathered wood, a gray piece of material, and an 18% gray card are useful for creating a more accurate exposure. Make sure to fill the frame of your camera with the image you are taking a reading from and use that exposure reading for the rest of the scene.


13. Be inspired! Here are 60 amazing photos to inspire you to brave the cold and capture some fabulous winter shots of your own!
http://photo.tutsplus.com/articles/inspiration/winter-snow-photography-tips/

14. You don't need snow to capture breathtakingly beautiful winter shots, ice and frost can be just as interesting as a snowy day.


Monday, December 5, 2011

20 Photography Mistakes I'm Happy To Have Made


It's been said that mistakes are the best teacher...well I couldn't agree more. Here's what I learned from my blunders on a recent practice photo shoot. At the time I was shooting family photos, so the tips in this post will reflect what I learned in this particular situation. May they help you as much as they've helped me.


1. Don't jump right in!: Take the time to select your camera settings based on your environment and the effect you want out of each shot. Pay attention to time of day and and whether your subject is stationary or in motion. This will greatly affect which settings you choose.


2. Fully utilize the features of your camera: You want to be sure to properly expose your subject. After changing your camera settings, take a few shots and don't settle for pictures that "look ok" on the LCD screen. Use the other features on your camera to help you make a better determination of your photo's exposure. Make use of exposure bracketing, exposure compensation and your histogram to help you. That's why they're there...to assist you!


3. Pay attention to weekly weather forecasts: Changes in the weather can really put a wrench in your plans. Plan ahead for weather changes by choosing two dates when setting up the original session. That way if weather is an issue you have another date as a back up. Something to pay attention to also is the weather the day before the session. If the day prior to your session was an icky, rainy one, look out for areas where water collection will be a problem. In addition to your planned locations for the session, have an additional spot to be used as a backup.


Have a back up plan for rainy days.

4. Change your camera settings as your scene/location changes: You won't have to change settings if your subject and available light remain constant ex. you are photographing a flower or an animal at rest. However, if your light source changes ex. you are shooting outdoors and then move indoors or you switch from shooting a portrait of a child to a child running around, you will have to make some adjustments to your camera settings.

5. Auto Mode is your friend: If you're shooting in manual mode and just can't seem to get the shots right switch back to automatic mode or one of the semi automatic modes like aperture priority or shutter priority. Remember you still have some control of the settings here, so check to make sure the camera is interpreting the shot the way you want. When all else fails snap a few shots in full automatic mode. This way you will not have lost the moment completely.

6. You can never take too many photos!: Take as many pictures as your SD card(s) can hold! Shoot the same scene a few times to make sure you have enough photos to work with. Using continuous shooting will allow you to catch subtle changes in the face of your subject or in their movements.

Take as many pictures as your SD card can hold. This
increases the chances of capturing the shot the way you intended.
7. Flash can be friend or foe: Flash use saps power from your batteries. When using flash and you don't have a back up battery, set your camera to the setting that allows the camera to conserve battery power (if it has that feature). If the battery is totally dead...a great tip I learned is to hold the battery tightly in your hand for a few minutes. This will restore some power to the battery making it good for a few extra shots!


8. All eyes on me!: When photographing large groups, there are times when you want them all to be looking at the camera and sometimes at each other. Well, at times when you want them all to be looking at the camera...make sure they are all looking at the camera...especially the little ones! This is a biggie! I had taken a beautiful family photo, the only one that was properly exposed and guess what? One of the children had their eyes closed! Needless to say, I had to discard that shot. Look for open eyes...lesson learned!

9. Take charge!: Never let the camera choose the focus point. It will select whatever's closest and zero  in on that. Use one focus point that you select and target what you want to be in focus.

10. Bring out the good stuff: Use your tripod, reflectors, 18% grey card of you have one, portable flash...every accessory you think you'll need to make the shoot a success, they make all the difference! It's not enough to just carry them around in your bag! Like I did! After my practice session, I reviewed my shots (that looked great on the LCD screen) and said, "Oh man! I should have used the tripod here," or "Reflectors would have worked here." Sometimes I get so wrapped up in the session, I don't want to break to grab stuff from my bag. Well, I learned my lesson.

Don't just travel with your gear...use it!

11. Little people become tired too: When photographing little ones, try to take as many photos with them first. Take their groups shots and individual shots earlier on when they are excited and ready to go. Then you can focus more on mom and dad or older siblings for their group or individual shots. If you wait until later to photograph "Little Bobby" individually, you may find that he is too tired, bored or has fallen asleep. As a side note, I have to say that some of the cutest pictures of my kids were taken when they were tired of my pointing the camera in their face because those photos capture other facets of their personality. From my experience though, I would still focus on the little ones first and then wait until later to photograph any antics they throw your way.

12. Look for shadows: I can't tell you how frustrating it is working around harsh shadows.  Photographing especially around noon when the sun is directly overhead, casts a deep shadow on your subject's face that's difficult to work with. Whenever possible, try to shoot on overcast days, during early morning hours or late evening. An hour before sun sets,  the sun casts a much softer light that's easy to work with. If you have no other choice but to shoot in full sun, try to find an evenly shaded area. Be aware however that you will need your ISO setting here to a higher number, ISO 400 works well in shady areas. White balance can sometimes be affected in shady areas so watch out for this and make adjustments if needed. You can also use a diffuser, fill flash or a reflector (a white umbrella, or piece of white foam core will work as well) to diminish those pesky shadows.

13. Introduce props as you need them: This applies to working with small children. If you have toys, candy, or anything that will attract their attention, introduce it right before you need to use it. Otherwise children can become preoccupied with the things in your "goody bag" making it difficult for you to shoot the other scenes when the prop is not to be used.

Props can be a distraction...bring them out right before they're needed.

14.  Look for unwanted elements in the background: Use a small f-stop like f/4.5 to blur the background or reposition your subject.

15. Expect the unexpected!: I should have made this tip number one! I'll give you an example. For this shoot I had chosen my locations weeks before and came back frequently to make sure they were still viable areas to shoot and they were. Close to the end of the session, I moved over to another area that I wanted to photograph them in. I started taking a few pictures and then someone said,"Make sure you don't step on that dead rat over there!" Oh my goodness! I had totally missed it! It wasn't a big deal, but it really taught me that sessions won't always go the way you planned not matter how meticulous you are! What to do? Remain calm and smile or break into a grin, which is what I did!

16. Plan wardrobe changes: Carefully plan how you are going to deal with wardrobe changes especially if shooting on location where it's difficult to make a full wardrobe change. It is possible however, to have your clients change their wardrobe with the same clothing. What? You heard me. Yes adding a jacket, scarf, hat, belt, buttoned shirt (worn over a another shirt),  are just some  of the ways to change your look. The reverse is also helpful, removing a jacket, hat or scarf can also make a subtle change to their look. You can also offer suggestions to your client concerning wardrobe choices/colors (prior to the session) that will enhance the overall look of their photos.

Discuss wardrobe changes before the session. 

17. Try shooting in RAW: I'm sure you've heard this a million times before. When shooting in RAW you are given more control over the look of your final image. Shooting in JPEG gives this control to the camera which will process the information from the image deciding what to keep and what to toss. What you have left when you upload it to the computer is an image that limits the changes you can make. I will discuss this topic in a future post, but until then, read this very informative article for more on this subject. http://www.digital-photography-school.com/raw-vs-jpeg. 


18. Think angles!: Shooting from different angles can result in a really interesting shot!


19. Breathe, relax, smile...you've got this: When a camera's stuck to my face I'm a happy camper! You'll notice that your enthusiasm will translate onto your subject(s) as well. Let them see that you are excited to photograph them and genuinely complement them...make them feel good about themselves as they should! One thing I found that was lacking for me was that I was running out of cute things to say to get the kids to smile. Here's a great article I found when looking for help in this department.
http://barbgordonphotocoach.com/blog/photographing/expressions-make-money20. wear comfortable shoes

20. Practice, practice, practice: I can't give you a better tip than this. Get out there, make mistakes and learn from them. This session has taught me so much, I feel better prepared for the many more to come and the lessons I'll learn then!


Has this list helped you? I want to hear all about it!


Friday, December 2, 2011

Entry Level Cameras for 2012...Take Your Pick!


This post led me to thoughts about my very first camera...the Polaroid One Step. I loved that camera! Since then I have purchased or have been gifted quiet a few other cameras that I was happy to "play around with" for a while.  As my love for photography grew, I found myself wanting more than the point and shoot cameras were capable of, so I invested in the Nikon D40x. I have to say that I couldn't be more pleased with this camera. It has deepened my love and appreciation for photography and has propelled me even further in developing my skills as a photographer. It's been almost three years now since I purchased my Nikon and today many other entry level cameras have taken its place. I thought it would be a good idea to introduce you to a few cameras that are great entry level cameras for the amateur photographer. I'll start with a brief summary of each camera and then provide you with a table you can print and take with you when shopping. The cameras are rated based on their features and performance. Please note that listed prices vary based on the retailer.


The Canon Rebel T3i is a happy medium for the amateur and professional photographer. It is easy to use and has many of the features of Canon's higher end cameras. The video on the Cannon Rebel T3i even boasts of better quality than many of the more expensive professional cameras! White balance on this camera is quite accurate as well as its color saturation and image detail. The included 18-55mm lens is adequate for shooting in most situations. For the price it is a great place to start! I enjoyed the overall feel of the camera and the quality of the images were satisfactory for the price.


18.0 Megapixel CMOS sensor powered with a DIGC 4 processor which means its fast and able to capture a wide range of colors.
3.7 frames per second - a bit slow when it comes to photographing kids at play or sporting events


The Nikon D5100 is an excellent starter camera, a do it all with many of the features of the more expensive cameras. Its image quality is stunning, a benefit of the camera's reduced noise capability. The vari-angle monitor on the Nikon D5100 is very useful when shooting from different viewpoints and helps increase visibility of the monitor when photographing in direct sunlight. Another great feature is its built in intelligent flash control which produces natural looking photos. The camera really wows in image sharpness and saturation as well. At 4 frames per second, it's a bit faster than the Canon Rebel T3i, and its battery life is also a bit better as well. I felt that the Nikon D5100 in terms of its size was satisfactory for a starter camera and I also liked the fact that it was not very heavy. It powers on quickly and shoots quickly. For the money, the camera's image quality and ease of use was a plus. 


16.2 MP DX-format CMOS sensor (better in low light) 
No wireless flash


The Canon T2i is an excellent choice because of its image and video quality. Amateur photographers will enjoy its ease of use and professional looking images without the price of a professional camera. Something I thought was quite neat was the fact that you can add your copyright information onto the camera without using additional software! Like its buddy the Canon Rebel T3i, at 3.7 frames per second it's not Superman by any means, so when capturing fast moving shots, it may leave you a bit disappointed. The T2i however will appeal to you because of the many features Canon has packed into it. They have taken features from the EOS 7D, valued at $1800.00 and included them in the T2i. Things to take note of with the T2i apart from its excellent image quality are its above average LCD screen, multiple HD capture modes and Digital Photo Pro image processing software (included) to name a few. 


18 mega pixels DIGIC 4 image processor - great for noise reduction


No wireless flash

Battery life 550 shots

Shutter speed 1/4000
Continuous shooting at 3.7 frames per second


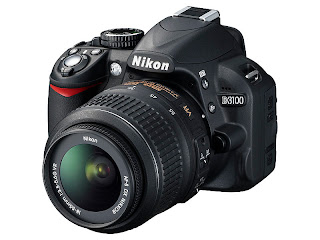
A very affordable, lightweight and compact entry level camera. A feature worth mentioning is the camera's active D-lighting capability which preserves image details when shooting in bright sunlight. This results in a better exposed image. The Nikon D3100 is well designed and fun to photograph with. It's an updated version of my Nikon D40x which I feel is an excellent camera. Any upgrades to this already stellar model would really make it a contender! Speaking about upgrades, for the the first time Nikon has added video to its entry level camera, an added feature! It incorportaes many of the must have bells and whistles of today's best entry level cameras. The Nikon D3100 comes with split second shutter release response and quick startup, its excellent image quality and saturation are also things to take note of. For the amateur photographer, this camera does not disappoint. What I took away from my experience with the D3100 was the fact that it was truly designed to guide the novice photographer... a sort of a mini tutor if you will. Select the guide mode and you are taken on a tour of the camera's basic features and how the are to be used. The Nikon D3100 is definitely worth taking a look at!


Continuous shooting at 3 frames per second


I thought I'd throw this into my line up not as an entry level camera of course, but for those of you like myself currently have an entry level DSLR camera and are looking to upgrade to a semi-professional camera to shoot more professional photos. The Canon EOS 60D is a semi-professional camera that ranks up there with some of the "top dog" cameras in terms of performance. Although its price is quite a bit more than the entry level cameras, it's well worth the investment. I enjoy the ease of the controls and the many features that increase the creativity and quality of my photos. The Canon EOS 60D challenges me to step out of my comfort zone with my entry-level camera and to take the giant step into the world of professional photography. needless to say, I am overall very impressed with this camera. 


18 mega pixels, DIGI 4 image processor
Prices starting at $1,099.00


Before purchasing, I asked myself a few questions. Use them to guide your purchase as well.


1. What's my purpose for purchasing a DSLR camera? 
2. How much money am I willing to spend?
3. Which features are important to me?
4. Do I want an entry level, semi-professional or professional camera?
5. Will I be doing a lot of traveling with this camera or shooting for extended periods?
6. Do I plan to print shots? If so, how large?


When you've answered these questions you're well on your way. The important thing to do now is - do the research, narrow your selection down to 3-5 cameras and compare them to find the best match. Then visit your local camera shop to get a feel for the cameras yourself. Something I did when compiling this review was to take my SD card and an item with rich, vibrant colors with me to the camera shop to photograph. (I got their permission to do this of course!) I did this because I've found that most pictures look great on the camera's monitor, but when they are uploaded to your computer, it's a different story. That's when you really get to see the image quality of the camera. The above photos were taken with the cameras I reviewed. I was quite happy with the results even after cropping them quite a bit. I was most impressed with the Nikon D5100 because it had the many of the features of a professional camera without the price. I liked the overall look and feel of the camera, the clarity, brightness and saturation of the colors. The articulating screen was a plus as well as the 3 inch LCD screen. Purchasing the Nikon D5100 is like having the higher end D7000 but with better screen, video performance, and a smaller and lighter body. I have to say too that the Canon EOS 60D is an excellent semi-professional camera if you want a few more features than the entry level cameras and if you have a few extra bucks to spend. 


Here are a few descriptions of terms discussed in the article that I thought would be helpful.


Color depth: Measures how many different colors the camera can capture. The better a camera's color depth the more colors it can distinguish. 16 bits is usually poor, larger values like 24 are excellent.


Sensor types: The camera's sensor produces the image you see. CMOS sensors are known for their image quality.

Megapixels: The more megapixels a camera has, the more detail you'll have in your images; but be careful, some cameras will boast of large megapixel values but don't deliver on image quality. There's nothing better than giving the camera a test drive before purchasing.

Focus points: Gives you a variety of options to choose from when selecting where to focus. The more focus points the more power you have over what is to be focused on in the picture.

Live View: The live view feature allows you to see the photo you're about to take on the LCD screen. YOu have the option of using both the LCD screen or the viewfinder.

Check out Google Product Search for camera prices and a map of where to find in your area.
http://www.google.com/prdhp


This site gives a review of the top ten entry-level DSLR cameras. Visit for added information on specifications and reviews at http://entry-level-dslr-camera-review.toptenreviews.com