
After a few days of reading the manual for my Nikon D40x and checking out all the bells and whistles, I have fallen in love with this camera all over again! When reading about the functions of each button I was also learning about the importance of aperture, shutter speed and ISO (International Standards Organization. I will discuss each of these features in a future post because they are fundamental to the art of photography.
Buttons To Take Notice Of:
It is easy to become overwhelmed when reading the manual because of all the information it contains. The introduction, "Getting to Know The Camera" was my starting point and proved to be helpful because for each button I was unfamiliar with, there was a page or pages that discussed each feature in depth. I was able to break the manual into bite size chunks that were easier to digest. This blog is in no way a substitute for reading the manual. I found that once I took the time to do so, I was pleasantly surprised at how easy it is to improve your photos by just taking the time to explore this awesome camera!
One of the buttons I found to be quite helpful was the mode dial.

The dial offers 12 different modes to shoot your photos. The advanced modes are P-Programmed Auto, S-Shutter-priority auto, A-Aperture-priority auto, M-manual and then there are the Point and Shoot Modes (that I used a lot in the not too distant past!) Although I thought I knew how to use these modes, there was much more to them than I had previously discovered. The point and shoot modes are pretty self explanatory based on the picture cues used to represent them, but here are a few tips I learned that made use of the buttons more effective and purposeful.
1. The auto (flash off) mode is great to use when taking portraits of infants or to use when flash photography is prohibited.
2. Portrait mode produces photos with soft, natural skin tones. It brings the closest subject into focus and depending how far away the subject is, the background will have a blurred effect.
3. Landscape mode is to be used to capture vivid shots of landscape. The camera again selects the closest subject as the focal point.
4. Child mode enhances the colors of clothing and the background. Skin tones are given a soft, natural effect.
5. Sports mode uses a fast shutter speed when shooting moving subjects. The camera freezes motion and keeps the subject in focus at all times.
6. Close up mode is great for taking pictures of flowers, insects and other small subjects. The camera focuses on the center area.
7. Night portrait mode is ideal for taking photos at night (you guessed it!) It captures the night while providing light to highlight the subject's features. Tip: A tripod should be used when in this mode because there is a risk of motion blur due to the slow shutter speed that is used.
Another button I was unfamiliar with was the exposure compensation button which is found to the far right of the shutter release button. It is indicated by a +/- symbol.
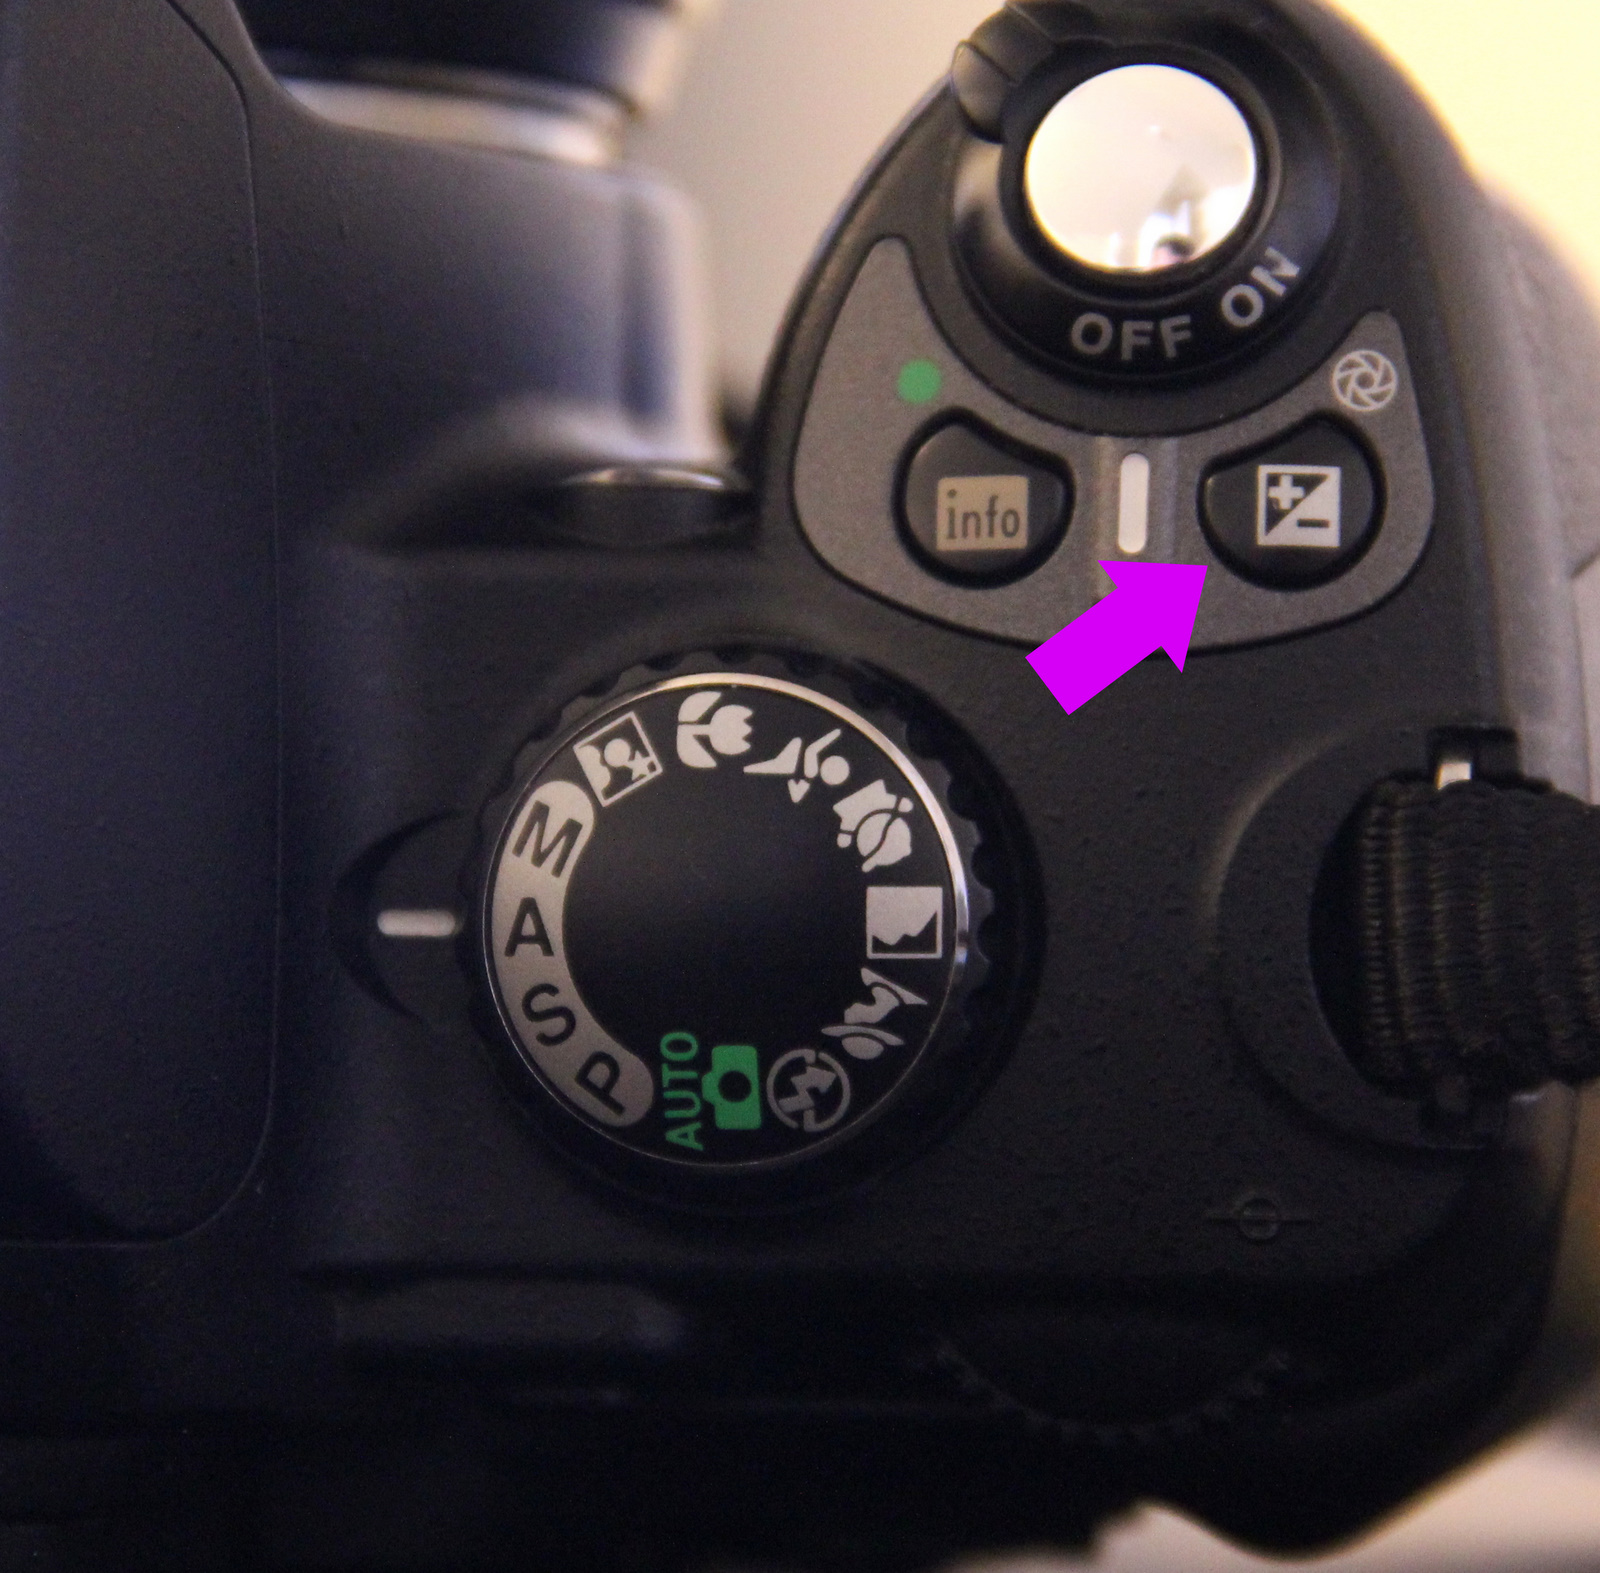
This button is to be used to make your photos brighter or darker. and can be used only when the camera is in the P,S and A modes.
The Fn button can be used along with other buttons as a short cut to a variety of functions.

Page 77 of the manual provides a detailed table of the button combinations. As a newbie, it was easier for me just to use the menu button to achieve the same results. Basically, the Fn button provides a short cut to the self timer, shooting mode, image quality/size, ISO sensitivity and white balance features of the camera.
The AE-L/AF-L (AutoExposure-Lock and AutoFocus-Lock) button I've learned is a great feature to take advantage of.

It just amazes me how often I have looked at it and said, "I wonder what that does?" Now that I'm aware of how useful it is, I use it all the time! I'm sure you will too. So here's what it does...it locks both focus and exposure in the P, S and A modes so that each time you recompose your shot, you don't lose your focus point or metering. For more information on this button, click on the following link: http://mansurovs.com/nikon-ae-l-af-l-button
Diopter adjustment control was another great discovery. It's found to the immediate right of the viewfinder. It looks like a thin bar that slides up or down.

The beauty of this feature is that it changes how your eyes see the subject you are photographing. It does this by adjusting the magnification of the camera's viewfinder to your suit your vision, thus alleviating the need to wear glasses when shooting. Nice!
The Command dial found to the right of the AE-L/AF-L button, can be used alone or with other buttons to make changes to the exposure, flash, shooting mode, image quality/size, ISO sensitivity or white balance. This button is somewhat similar to the Fn button that I wrote about earlier.

There are many other bells and whistles on the Nikon D40x, I chose to write about the ones that I needed to become familiar with. Check out the manual for additional information on any of the buttons I have not mentioned that you are curious about. Happy reading!
This article contains many terms that you may be unfamiliar with as I once was. In the upcoming posts I will discuss more about these features so don't panic!
